

shortcuts
| Shortcut | Function | Description |
|---|---|---|
Tools/Options/Audio/Playback |
Preferences - Audio - Playback | Select playback hardware |
Tools/Options/Audio/Record |
Preferences - Audio - Record | Selects input hardware |
Tools/Options/Audio/Default Sample Rate |
Preferences - Audio - Default Sample Rate | 22 - 32 - 44,1 - 48 - 88,2 - 96 Khz |
Tools/Options/Audio |
Preferences - Audio - 16 bit resolution | 16 bit |
Tools/Options/Audio |
Preferences - Audio - 24 bit resolution | 24 bit |
Tools/Options/Audio |
Preferences - Audio - Exclusive mode | Will takeover the audio device |
Tools/Options/interface |
Preferences - Interface - Center Playhead after Zoom | Will set the playhead in the midle of the workspace after zooming in around the playhead |
Tools/Options/interface |
Preferences - Interface - PreRoll Time | Set the time for Preroll |
Tools/Options/interface |
Preferences - Interface - Loop on Play Selection | Loop on play selection |
Tools/Options/interface |
Preferences - Interface - Record with Pre-Roll | Playhead will jump back the durration of the PreRoll time and play the audio before the autual recording |
Tools/Options/interface |
Preferences - Interface - Return On Stop | Sets Playhead at the point of origin for Playback |
Tools/Options/Advanced |
Preferences - Advanced - Perform automatic leveling after recording and import | Perform automatic leveling after recording and import. |
Ctrl N |
File - New | Create a new session. |
Ctrl O |
File - New from Template | Open a session. |
Ctrl O |
File - Open | Open a session. |
Ctrl S |
File - save | Save |
Shift +Ctrl S |
File - Save as | Save as |
Ctrl T |
File - Import | Import audio into the workspace |
Ctrl E |
File - Export | Export your session as a mixed down file. Audio Books, ACX and Findaway |
Shift + Ctrl E |
File - Export Selection | Export the current selection as file |
file/ properties/ info |
Properties - Info | Meta Data Properties for the current session |
file/ properties/ tracks |
Properties - Tracks | Organize the tracks. Add, delete and rename the tracks |
file/ properties/ Style |
Properties - Styles | Set the Class and Text for the Heading Levels |
file/ properties/ Book Export |
Properties - Book export | Set the Export Audio format and properties for the Book |
file/ properties/ defaults |
Properties - Default | Save default session. Revert to factory settings |
Ctrl Z |
Edit - Undo | Erase the last change done in your session. |
Shift + Ctrl Z |
Edit - Redo | Recover any unintentional edits made in your session. |
Ctrl X |
Edit - Cut | "Cut selection" is used when editing out a selection of audio. This could be a single word, a breath or a sentence. |
Ctrl C |
Edit - Copy | “Copy” will add the selection to the program memory and can be pasted or inserted later. This can be used to copy a breath or ambience. |
Ctrl V |
Edit - Paste | "Paste” is used when placing audio in on top of existing audio This can be used to replace sections of the current audio. |
Ctrl V |
Edit - Paste in selection | "Paste in selection" is used when placing audio in a selection. This can be used for adding ambience or music to a specific area. |
Shift + Ctrl V |
Edit - Replace | "Replace" is used to replace audio. This can be used to replace for example a short breath with a longer breath. |
Ctrl I |
Edit - Insert | "Insert" is used when inserting audio in front of existing audio. This can be used to move words and sentences in front of the current audio. |
Backspace |
Edit - Clear / Delete | "Delete/clear - is used when editing out audio. In this case an entire region. Use this for removing entire blocks of audio. |
Ctrl B |
Edit - Split | “Split” or “Break” is used to separate a region. This can be used to quickly select areas that later can be removed or moved. |
| Edit - Consolidate | Consolidates the selected region to a single region | |
Ctrl D |
Edit - Duplicate | "Duplicate" is used to duplicate a region or selection. This can be used for for making music loops or duplicating ambience. |
Ctrl F |
Edit - Fade | Creates a fade on the selection or, if no selection, at the playhead |
Enter or F2 |
Edit - Rename | Rename Region |
Ctrl G |
Edit - Group | Groupes the Selected regions |
Alt + Enter |
Edit - Properties | See information about the region. |
Alt + Enter |
Edit - Info | Information about the region |
Ctrl right arrow |
Edit - Insert Silence | “Insert Silence” is used to insert blank room in the edit. |
Ctrl left arrow |
Edit - Remove Silence | “Delete Silence” is used to delete blank room in the edit. |
| View - Toolbars | Where to find the toolbars | |
| View - Toolbars - Tools | Display tools in the top left corner. | |
| View - Toolbars - Transport | Shows / Hides the Transport menu | |
| View - Toolbars - Counter | An alternative counter that diplays: | |
| View - Toolbars - Counter - Time | Current time in Global Session | |
| View - Toolbars - Counter - Session | Total time of session | |
| View - Toolbars - Counter - Recorded | Time Recorded. Time can be reset for time registration. | |
| View - Toolbars - Counter - Reset Time | Reset the Recorded time Counter | |
| View - Toolbars - Clock | Current time of day | |
| View - Toolbars - Bookbar | Diplays buttons for settings Headings in Manuscript | |
| View - Toolbars - Narration bar | Diplays Previos and Next Buttons | |
| View - Toolbars - System monitor | Open the system monitor. | |
Alt + Ctrl C |
View - Clipboard | Open the Clipboard View |
Alt + Ctrl M |
View - Markers | Open the Markers View |
Alt + Ctrl F |
View - Favorites | Open the Favorites View |
Alt + Ctrl S |
View - Manuscript | Open the Chapters View |
Alt + Ctrl N |
View - Navigation View | Open the Navigations View |
Alt + Ctrl T |
View - Table of Content | Opens the Table of Content |
Alt + Ctrl X |
View - Text Source | |
Ctrl Plus or Ctrl Mousewheel |
View - Zoom - Zoom in | Zoom in to see more details and zoom out to get a better overview. |
Ctrl Minus or Ctrl Mousewheel |
View - Zoom - Zoom out | Zoom in to see more details and zoom out to get a better overview. |
Shift + Ctrl Plus |
View - Zoom - Increase track height | “Zoom Track Height” is used to make the tracks larger or smaller. |
Shift + Ctrl Minus |
View - Zoom - Decrease track height | “Zoom Track Height” is used to make the tracks larger or smaller. |
Ctrl H |
View - Zoom - Zoom Selection | “Zoom selection” is used when zooming in on a specific area of the audio. |
| View - Track Display Mode | Change the track display mode, to either 'All', 'Branch', or 'Leaf'. 'All' Displays the entire session. | |
Ctrl M |
View - Track Display Mode - Moved to view from TOC dropdown | Change the track display mode, to either 'All', 'Branch', or 'Leaf'. 'All' Displays the entire session. |
| View - Waveforms - Enable | Show or Hide the Waveform Display | |
| View - Waveforms - Peaks only | Set the waveform to only view the peaks | |
| View - Grid - Enable | View a Grid on the Timeline | |
| View - Grid - Fine Grid | ||
| View - Automatic Scroll | Workspace will follow playhead | |
| View - Enter Full Screen | Full Screen | |
| Tools - Split Stereo | Devides a Region into two tracks L&R | |
Ctrl L |
Tools - Auto level | Sets the levels for the Regions at -21 LUFS |
| Tools - Automatic Markup | ||
| Tools - Automatic Phrase Detection | ||
| Tools - View Statistics | View Statistics about the session | |
| Tools - Session Cleanup | Cleanup your session | |
| Tools - Customize | Customize the Keyboard Layout | |
| Window - Reset Layout | Resets the Program Layout to the default | |
Mac Only |
Help - Search | Search in the menu's |
| Help - Contents | Goto Hindenburg.com/guide | |
| Help - Registration key | Input the registration key | |
| Help - Check for Update | Search for the latest update | |
| Help - About | Version Number | |
| Tracks - Track name | Input track name | |
| Tracks - Volume | Adjust the volume on the track | |
| Tracks - Pan | Adjust the pan on the track | |
Shift + R |
Tracks - Arm track | Prepare the track for recording |
Shift + M |
Tracks - Mute | Mute the track |
Shift + S |
Tracks - Solo | Solo this track |
| Tracks - Effects | Add effect to the bin | |
| Tracks - Rearrange Effects | Drag to reorder the FX in the slots | |
| Tracks - Source Input | Mic, Soundflower, Loopback, Line .... | |
| Tracks - Voice Profile - Apply Generic Profile | Apply a Generic Voice Profile to the Track | |
| Tracks - Source input | Mic, Soundflower, Loopback, Line .... | |
| Tracks - Voice Profile - Apply Personal Profile | Apply a Personal Profile to the Track | |
| Tracks - Voice Profile - Learn Profile | Create a Profile from the current Tracks audio | |
| Tracks - Add Track | Add a New track | |
| Tracks - Add Master Track | Add a Master track | |
| Tracks - Delete Track | Delete Track | |
Alt G |
Counter - Counter | Shows Playhead and Selection Time for the current Branch View |
| Meter - Meter | Shows the volume with the current Meter Setting | |
| Meter - Digital QPPM | Traditional Meter as used in Public Radio | |
| Meter - BBC PPM | Meter used by BBC | |
| Meter - Peak | Has no built in delay | |
Tools / Options / Audio / Playback |
Preference - Audio - Playback | Select playback hardware |
| Tracks - Link Tracks | Link tracks together | |
Ctrl + Spacebar |
Record | Begin recording on a track |
| Record - Record Monitor (1) | Record monitor is used for activating/deactivating the monitor input | |
J K L |
Scrub - Scrub JKL | Scrub trough the audio and different speeds |
| Meter - VU | Shows the level as VU | |
| Meter - EBU R128 | Shows the level as EBU R128 | |
Home |
Transport - Home | Goes to the beginning |
Left Arrow |
Transport - Rewind | Rewinds the playhead |
Spacebar |
Transport - Stop | Spacebar toggles Play & Stop |
Spacebar |
Transport - Play | Spacebar toggles Play & Stop |
Ctrl + Spacebar |
Transport - Record | Begin recording on a track |
Right Arrow |
Transport - Forward | Forwards the playhead |
End |
Transport - End | Goes to the End |
"full stop" |
Transport - Vari-speed | Adjust the speed of the playback |
Shift + spacebar |
Transport - Play Selection | Solo's the track and plays the selction |
Shift + spacebar |
Transport - Loop Selection | "Solo's the track and Loops the selction. Cmd click on the ""play"" icon to toggle Loop Selection " |
Ctrl + Shift + Spacebar |
Transport - Rehearse | Listen to the end result of an edit before you do the actual editing |
P |
Transport - Preroll | Preroll will set the playhead back a few seconds and playback the audio from that point |
Ctrl + Spacebar |
Record | Begin recording on a track |
Shift R |
Record - Arm track | Prepare a track for recording. This identifies the track that you wish to record on. |
| Record - Record Monitor | Record monitor is used for activating/deactivating the monitor input | |
Ctrl + Spacebar |
Record - Punch in Recording | Manually punch in to record |
Shift + Alt R |
Record - Record Selection | "Select an area of text to Re-Record. The new recording will automaticcally be edited in place" |
J K L |
Scrub - Scrub JKL | Scrub trough the audio and different speeds |
Numpad: 1&3 - 4&6 - 7&9 |
Scrub - Scrub | Play forward and back in Narrator at different speeds. |
Arrow key up & down |
Navigate - Tracks up & down | Navigate between the tracks with the up & down arrow keys |
Arrow Left & arrow right |
Navigate - Rewind & Forward | Use the arrow keys left & right to run trough the audio |
Page up & Page down / Tab & Shift+Tab |
Navigate - Next / Previous event | Jump to the next event. This could be the next splice or marker |
Shift + arrow keys left & right |
Navigate - Next / Previous region | Jump to the next region event. This shortcut will also highlight the region under the playhead |
Shift + Home |
Navigate - Goto First edit | Select all the regions from the current region to the first region |
Shift + End |
Navigate - Goto Last Edit | Select all the regions from the current region to the last region |
i & o / Cmd 1 & Cmd 2 |
In & Out Selection - Selection in & out | To edit audio you need to select an area for editing. This can be used cutting out words, copying audio or any other edit you can think of. |
Drag "i" beam |
In & Out Selection - Drag selection | Reposition the "in" marker to drag the "i" beam. |
Click region |
In & Out Selection - Highlight region | Highlight a specific region. |
Tripple-click |
In & Out Selection - Highlight between region | Select area between regions |
shift + mouse drag |
In & Out Selection - Marquee selection | Use the Marquee tool to select regions in Hindenburg. |
Mouse |
Regions - Trim | Drag Trim Handle |
shift + Ctrl Mouse |
Regions - Shuffle Trim (Slip Edit) | Move the edit point without breaking the edit apart |
Click region |
Regions - Select - Region | Select a region to edit the entire region. Add fades or any edit function, like Cut, Copy & Paste. |
Ctrl Click region |
Regions - Select - Regions | Select multiple regions for editing. Cut, Copy & Paste or move the regions around |
Shift + Click region |
Regions - Select - More Regions | “Expand region selection” is used for adding additional regions to a selection. Use this for adding an edit to all regions |
Ctrl A |
Regions - Select - Regions on Track | Select all the regions on one track |
Alt + Ctrl A |
Regions - Select - All Regions | Select all the regions on all tracks |
Shift + Alt End |
Regions - Select - All Regions - to end | Select all the regions on all tracks from the current region to the last region |
Shift + Alt Home |
Regions - Select all Regions - to home | Select all the regions on all tracks from the current region to the first region |
Alt + Ctrl Mouse |
Regions - Select all regions after selection | Select all the regions from the current region to the first region |
Esc |
Regions - Selection - remove | Clear any selection by pressing the ESC key or double-clicking in a empty area in the workspace |
Ctrl Arrows |
Regions - Nudge Region | Moves the region in milisecond increments |
Ctrl Arrows Up & Down |
Regions - Move regions between tracks | Moves the region between tracks |
| Regions - Consolidate | Merge regions into a Smart Region | |
Alt + Enter |
Regions - Properties - region | The regions contain meta data for the audio |
| Regions - Relink Audio | Point to audio for Region | |
Shift + Ctrl arrow up/down |
Volume - Gain | “Duck” is typically used for “ducking” music under narration. This can also be used for ambient beds or voice over |
Ctrl F |
Volume - Fade | “Fades” are used for making smooth transitions from one piece of audio to another - or for gently bringing in ambience or music. |
Shift + Drag |
Volume - Fade - Slope | “Fade slope” is used to make a more gradual fade. |
Alt + Drag |
Volume - Fade - Multi Regions | “Fade over multiple regions” is used to create a single fade over small regions. This could be ambience or edited music. |
| Volume - Fade - Cross Fade | “Cross Fade” is used for making a transition from one sound to another on the same track. | |
Ctrl F |
Volume - Fade - Multitrack | “Multi track Fade” is used for adding the same fade for more than one track. |
Ctrl mouse |
Volume - Fade - Cross Fade point | “Cross Fade point” is the cross section of the fade. It can be moved to fit the fade point better. |
Ctrl right arrow |
Volume - Insert silence | “Insert Silence” is used to insert room into the edit. |
Ctrl Alt + C |
Clipboards - Clipboard | The clipboard is used for organizing the audio material |
Ctrl Drag |
Clipboards - Drag selection | Drag soundbites from the workspace to the clipboard |
Ctrl Drag |
Clipboards - Drag Regions | Drag a region or multiple regions from the workspace to the clipboard |
Alt + Ctrl 1,2,3,4... |
Clipboards - Move selection | Move a selection from the workspace to a clipboard group |
Alt + Ctrl 1,2,3,4... |
Clipboards - Move Regions | Move a region or multiple regions from the workspace to a clipboard group |
Alt + Ctrl 1,2,3,4... |
Clipboards - 2x Move Regions | Move a region to a clipboard and rename in one |
Alt + 1,2,3,4... |
Clipboards - Move to workspace | Move clips from the clipboard to the workspace Note: Every group has a unique number; 1, 2, 3, 4 …. |
Enter |
Clipboards - Rename | Rename the region |
Delete |
Clipboards - Delete | Delete a clip in the clipboard |
Ctrl Enter |
Clipboards - Paste Clip | Paste a clip from the clipboard to the workspace |
Shift + Enter |
Clipboards - Insert Clip | Insert a clip from the clipboard to the workspace |
Alt + Enter |
Clipboards - Properties | View the clip properties |
Right-click / Delete used |
Clipboards - Delete Used | Delete all the used clips in the group. |
Ctrl T |
Clipboards - Import | Clipboards - Import |
Ctrl Del |
Clipboards - Clear All | Delete all clips in the clipboard |
Alt + Ctrl M |
Markers | The Markers View is the where you can see, rename and move to marker point |
Ctrl Enter |
Markers - Markers - set new | Markers are used for quick navigation in the session |
3 - 0 |
Markers - go to | Double-click any marker in the markers list and the playhead will navigate to that point |
Shift + Enter |
Markers - Rename | Rename the markers |
Shift + Enter |
Markers - Renumber | Renumber the markers |
Delete |
Markers - Delete | Delete a Marker |
Option + Ctrl Enter |
Markers - CuePoint | Mark points of interest in the Audio. The Cue Point will be locked tot he audio and not the timeline. The Cue Points will follow your edits. |
Ctrl Alt + F |
Favorites | Same functions as Clipboard |
Shift + Ctrl E |
Favorites - Export Selection | Export any selection of audio. |
file/ properties/ info |
Favorites - Properties | Meta Data Properties for the current session |
| Import formats - .wav | Import a WAV (.wav) file in your current session. | |
| Import formats - .nhsx | Import a Hindenburg (.nhsx) file in your current session | |
| Export formats - Wav | Export your audio in the WAV (.wav) format. | |
| Export formats - Mp3 (.mp3) | Export your audio in MP3 (.mp3) format. | |
| Export formats - Mp2 (.wav) | Export your audio as a MP2 (.wav) file. | |
| Export formats - Mp2 (.mp2) | Export your audio as an MP2 (.mp2) file. | |
| Export formats - ACC (.m4a) | Export audio in ACC.m4a | |
| Export formats - Apple Lossless (.m4a) | Export audio in Apple Lossless.m4a | |
| Export formats - Audio Interchange (.aif) | Export your audio in Audio Interchange (.aif) | |
| Export formats - FLAC (.flac) | Export audio in the FLAC (.flac) format. | |
| Export formats - OPUS (.opus) | Export audio in the OPUS (.opus) format | |
| Export Book formats - Audiobook | Export your session in the Audiobook format. | |
| Export Book formats - ACX | Have your book audio and pause corrected to fit ACX standards. | |
| Export Book formats - Findaway | Export your session in the Findaway format. | |
| Open Book formats - Epub | Open your book in the Epub format | |
| Open Book formats - DocX | Open your book in the DocX format | |
| Open Book formats - HTML | Open your book in the HTML format | |
Arrow Down |
Manuscript - Read Mode - Next Heading | Jump to next H1 |
Arrow Up |
Manuscript - Read Mode - Previous Heading | Jump to previous H1 |
Arrow Right |
Manuscript - Read Mode - Next Item | Navigate to next Item |
Arrow Left |
Manuscript - Read Mode - Previous Item | Navigate to prewvious Item |
Ctrl 1 - 0 |
Manuscript - Insert Heading | Set shortcut in Styles for Headings |
Ctrl Enter |
Manuscript - Link Text to Time | Links the current text to the playhead time in the Audio |
Shift + Ctrl Enter |
Manuscript - Link Text to Time & Select Next | Links the current highlighted text to the playhead time and Highlights the following Text Item |
TAB |
Manuscript - Jump (guesstimate) the paragraph ending | with full-text books it's possible to jump to the near end of the next paragraph. Making it easy to manually mark up text and audio |
Delete |
Manuscript - Delete Text | Deletes the current Item |
Enter |
Manuscript - Write Mode - Enter Text Input Mode | For correting or adding text |
Ecs |
Manuscript - Write Mode - Exit Text Input Mode | Return to Read Mode |
Enter |
Manuscript - Write Mode - New line | Create a new line in your text |
Ctrl Z |
Manuscript - Write Mode - Undo | Undo en edit in the manuscript |
Shift Ctrl Z |
Manuscript - Write Mode - Redo | Redo a function you would like to recover. |
Shift R |
Manuscript - Record Mode - Enter Record Mode (from Read Mode) | Arms the Track |
Shift R |
Manuscript - Record Mode - Exit Record Mode | Unarms the Track |
Right Arrow |
Manuscript - Record Mode - Record | Select where you would like to record and start recording. |
Left Arrow |
Manuscript - Record Mode - Stop | Stop at a certain point of the manuscript. |
Left Arrow + Right Arrow |
Manuscript - Record Mode - Punch in | Set the playhead at the desired input time |
Right Arrow |
Manuscript - Record Mode - Punch in with Preroll | Set the playhead at the desired input time. The Pre-Roll will playback the previouse audio and puch in at the desired time |
Alt + Shift R |
Manuscript - Record Mode - Record selection | "Select an area of text to Re-Record. The new recording will automatically be edited in place" |
Ctrl + Left & Right Arrows |
Manuscript - Move Cursor | How to more the cursor |
J K L |
Manuscript - Scrub JKL | Scrub trough the audio and different speeds |
Numpad: 1&3 - 4&6 - 7&9 |
Manuscript - Scrub | Scrub through the audio at different speeds using the number pad. |
Alt + Ctrl T |
TOC | Opens ot Navigates to the TOC |
Ctrl 1- 6 |
TOC - Expand / Collapse | Expands or collapes the tree structure in Levels 1- 6 |
Enter |
TOC - Rename | Rename Headline in TOC & Manuscript |
Arrow Down / Click Text |
Narration View - Next Heading | Jump to the next heading in Narration view. |
Arrow Up / Click Text |
Narration View - Previous Heading | Jump to the previous heading in Narration view. |
Arrow Right / Click Text |
Narration View - Next Item | Jump to the next item in narration view |
Arrow Left / Click Text |
Narration View - Previous Item | Jump to the previous item in narration view |
Spacebar / Play Icon |
Narration View - Play Audio | Play audio while in Narration view |
Spacebar / Stop Icon |
Narration View - Stop Audio | Stop audio while in Narration view |
| Narration View - End | Jumps to last recorded | |
Press Record Icon |
Narration View - Record Ready | Enter Record Ready Mode |
Right Arrow |
Narration View - Start Recording | Begins the Recording |
Left Arrow |
Narration View - Stop Recording | End the Recording |
Click Text |
Narration View - Navigate in time | Navigate in the audio by clicking in the text |
Right Arrow |
Narration: View - Punch in Recording | After selecting text position for playback, then proceed with the punch in Recording |
| Export Book formats - Epub | ||
| Editing in view mode | re-record a selection in Leaf Mode. Trim audio, delete silence, edit text and split audio | |
| Book export settings | Set up the export settings for DAISY 2.02, Epub 3 & Audio books. Set the audio format, quality & split-level. | |
| Book export | Export the finished book in a number of different formats. DAISY 2.02, Epub 3, NLS DTB, Audio book. | |
| Customising styles | Customise the book bar to fit your needs. Rename entries. Move, delete and hide entries. | |
| Sync text & audio 1 | Synchronise audio and text. Manually set navigation points that link text and audio. | |
| Sync text & audio 2 | Synchronise audio and text 2. Use TAB and Hindenburg ABC will guess the next location for the navigation point based on the text. | |
| View mode | View Mode. Use the view mode to get a better overview of the audio. All, Branch & Leaf mode will be explained in the tutorial. | |
| Create structure & record | Create structure for a physical book and record the narration. Set Headings and rename them. Record with punch in from both the Manuscript view and the Narration view. | |
| Record ePub in Narration view | Open a ePub book and narrate it using the Narration View. Use both manual punch in recording and navigation in text. | |
| Record ePub book | Open a ePub book and narrate it. Use both manual punch in recording and punch in with pre-roll. |
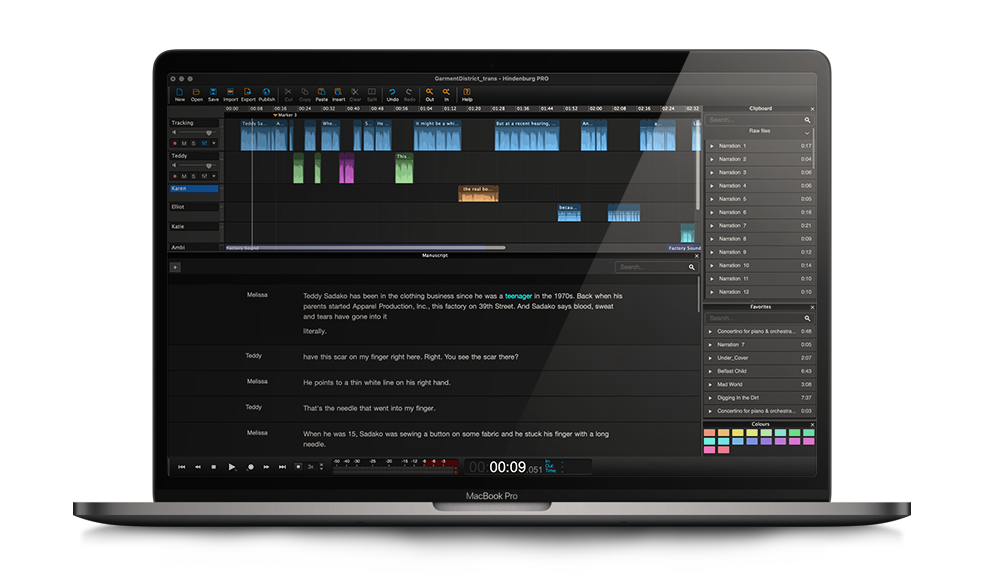
Hindeburg PRO

Narrator